Guides
| Warning | Work in progress! We are in the process of updating the information on this page. Subject to change. |
Guides are an optional component of the resco.ServicePlatform that allows you to create documentation that your technicians in the field can follow.
Features
- Guides: Documents that combine images, text content, and PDF attachments that are related to a particular record (for example, a piece of machinery) that users of Resco mobile apps can display in their apps.
- Guides editor: A web application accessible from the Resco Cloud landing page which allows you to create, modify, and publish guides.
- Feedback: App users can rate the guides as feedback for the guide editors.
- Drafts: App users can quickly assemble draft guides: take photos and add comments. Guide editors in the back office can then expand the guides, add some polish, and then publish them to make the information available to all users in the field.
Prerequisites
- Resco Cloud backend
- Release 15.0 (spring 2022) or later
Configuring in Woodford
- Enabling guides
- Edit an app project in Woodford.
- Select Settings > Guides from the Project menu.
- Select Enable Guides.
- Select the entities for which you want to define guides. For example, if you want guides for your products, select the Product entity. You can add multiple.
- Select Enable Feedback and set the delay after viewing a guide when a feedback form appears.
- Click Save.
- Optionally, click Add To Home if you want to add the Guides view as the last item on your home screen.
- Adding guides to entity forms
- The home screen item lists all guides. Alternatively (or in addition) to the home screen button, you can a list of related guides to an entity form. Users that display a record can then see the list of relevant guides.
- Edit an entity form.
- Click Add List and select "Guides List".
- Optionally, set up a filter, for example,
Status Reason Equals Published. - Save all changes.
Adding guide categories
Guides that you create can belong to a category. To keep your guides organized, create guide categories that are suitable for your organization.
- Start the Admin Console.
- Select Data > Manage Data.
- Scroll down to the Guide Category entity and open it.
- Click New and enter a category, for example, "maintenance" or "repair", and save it.

Guides editor
- Log in to your Resco Cloud organization.
- On the landing page, select Guides Editor.

The editor screen offers several functions that should make your work a pleasant experience:
- Filters in the left pane allow to you quickly locate what you need. You can filter guides according to their category and status.
- Sort by: Select how should the displayed guides be ordered in the top row.
- View as: Switch between grid and list view.

To work with a particular guide, do one of the following:
- select it and use the top row buttons.
- hover over a guide and use the buttons that appear.
The following functions are available:
- Edit
- Duplicate (clone)
- Archive
- Share: Available for published guides. Displays a QR code that you can scan on your phone to open the guide.
- Preview
- View feedback
- Publish or unpublish
I don't see guides editor
If you are using a resco.FieldService or resco.Inspections organization with a custom manager's landing page, there's no Guides Editor link on it. You can add it manually.
- Start Woodford (System Administrator > Manage Apps or Administration > App Configurator).
- Go to the Manager app project and edit its home screen.
- Click Add IFrame and add the link to the Guides Editor in the following format. Replace the sample with a valid link to your organization.
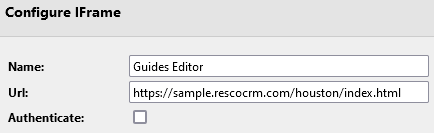
- Save all changes and publish the app project.

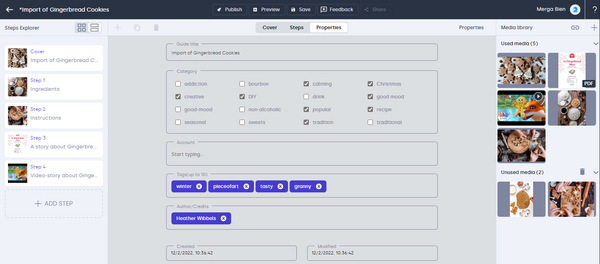
Creating a new guide
- On the list of guides, click New Guide.
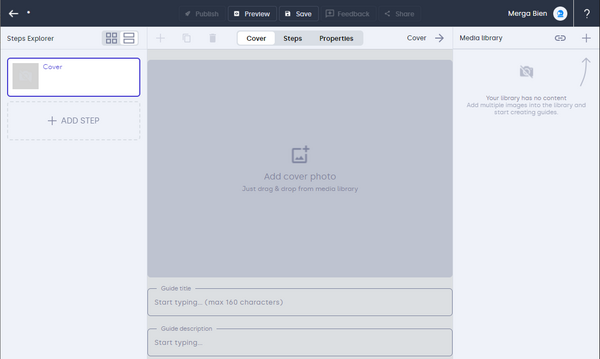
- In the Media library pane, click the plus button and upload images or PDF that you plan to use in the guide.
- Drag an image from the Media library pane to the central pane. You can then click Edit to crop the image or annotate it with text, arrows, or similar effects. Remember to save changes.

- Enter a title and description for your guide.
- In the Steps Explorer pane, add a new step.
- Just like for the cover page, drag an image from the library and enter a title and a description for the step. You can add more descriptive paragraphs, tips, or warnings as needed.
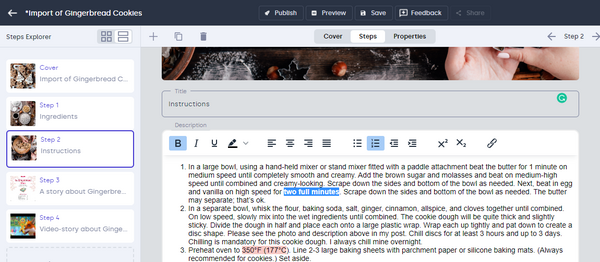
- Continue adding steps until the guide is complete. You can reorder steps on the Steps Explorer pane by dragging them to the right location.
- Switch to the Associate tab to edit guide properties.
- Save all changes and publish your new guide.


Using guides in the app
In the app, you can find guides in two places:
- On the home screen - all guides (if you used the Add To Home button in Guides configuration)
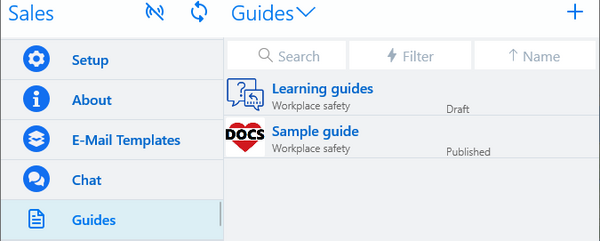

- On the entity form - related guides (if you added the related guides list to the form)
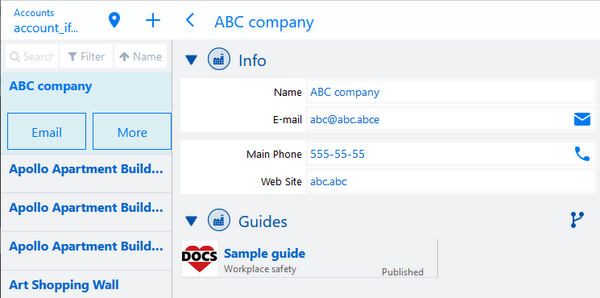

Tap the guide that interests you to display it.


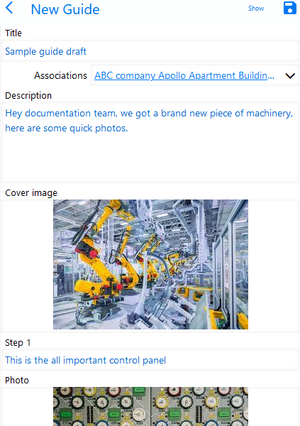
Creating draft guides in the app
You can also create new draft guides:
- On the home screen, tap Guides.
- Tap the plus button in the top right corner.
- Add a title, description, steps, and photos.
- Save the guide.