Row script
| Rules and examples |
|---|
|
 Row script rules are executed for each row when a view is loading or refreshing. If your view includes multiple row designs, you can use row script to define conditions when a specific row design should be used. Another use case for row script is defining custom variables and placing them on the view.
An additional example of row script use is available on our blog: blog post Blog
Dos and don'ts
- Do not use LoadFetch, LoadReference, and NewInstance in row scripts, even if Woodford allows you to configure them. These asynchronous operations do not work in this context and can cause problems.
- Always initialize shared variables before using them. If you use multiple shared values, initialize them in order. This applies to all rules but can be particularly critical in the case of views, where uninitialized shared variables may cause the app to crash.
| Note | In release 18.2, we fixed a bug where the order in which you initialize variables affected the rule execution. As a result, when upgrading to 18.2 or later, some of your row scripts that have accidentally worked because of the bug might suddenly stop working. For example, you might observe swapped values in cells. If you experience such behavior, please correct the cell bindings of your view and republish the app project with the latest Woodford. You can also contact Resco support for assistance. |
Multiple views example
In the following example, we will create a second row with a red background, this will be used when the field Name does not contain data.
Create a new style with red background
- Click Edit Styles to display the Style editor.
- Select primary from the style list, and then click Add. This creates a clone of the primary style.
- Change the BackColor (background), ForeColor (text color), and rename the style (for example Red Primary).
- Click Save & Close to close the styles editor and return to the view designer.
Create a second row
You have multiple options for creating rows:
- Click Clone Row to create a copy of the row selected in the Properties pane. Then rename the row, for example to RedRow.
- Click Add Row to create an empty row, where you can add fields and design it from scratch.
- You can also click Copy Design to copy the design of any view from any entity.
In the new row, select a cell and change the style from Primary to Red Primary.
Create a row script
To define when and how the different the row designs are used, you need to set up a row script. Row script is a combination of steps and conditions (what should happen and when).
- Click Row Script to open the script editor.
- Add the following conditions and steps.
- If entity.name does not contain data
- Then Step TemplateIndex Assign RedRow
- Else Step TemplateIndex Assign Default
- Click Save & Close.
Custom field on the view
In this example, we create a custom field to add to the Order view row. First, we add a new string variable where we concat the fields we wish to have in the row.

Next, we add this variable to our row.

This is how it looks in the application.

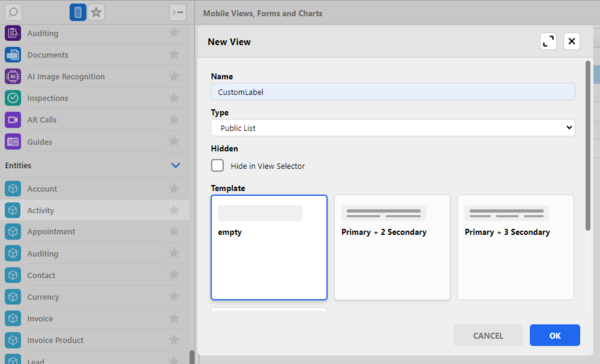
Custom label for calendar entries
The calendar is divided into four views: agenda, day, week, and month. While the agenda view displays all fields from the selected entity view, the other calendar views traditionally show only a single field (it's the first field on the view with the Primary style). In this example, we create a custom variable that combines multiple fields even in day/week/month views.
| Note | In release 19.0, we have introduced customizable calendar cards that can include up to three fields or variables. Cards are the recommended way of customizing custom labels, but you can continue using the method described in this section. |
- Edit an app project in Woodford.
- Create a new view for the Activity entity (or other entity you want to display as calendar).
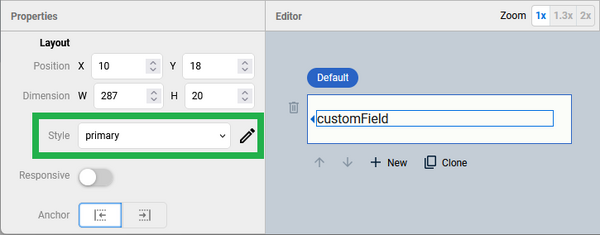
- Click Row Script and define a new string variable. You can fill it by concatenating fields and text. In the example below, we're using the "Format Text" function.
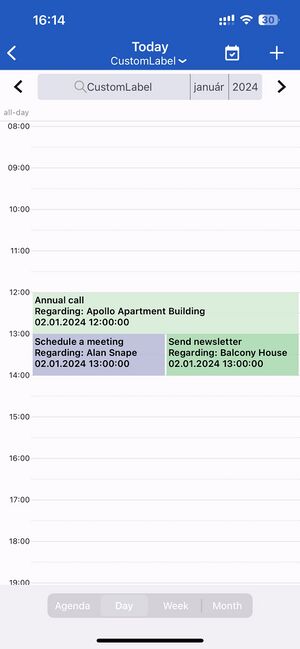
String used in this example:{Entity.name}\nRegarding: {Entity.regardingobjectid}\n{Entity.scheduledstart}
- For entity records, use curly brackets and insert field logical (not Display) name, e.g.,
{Entity.name}or{Entity.regardingobjectid}. - For new lines, use
\n. - For additional text that's not part of the data (various labels); just type string.
- For entity records, use curly brackets and insert field logical (not Display) name, e.g.,
- Save the row script and place the custom variable into your view. Make sure that the style is set to "Primary".
- Save all changes, publish the project, and verify the results in the app:


Custom color for calendar entries
You can use rules to override the default colors of calendar entries.
- In calendar rules, there's a built-in variable called "Color", and the user interface includes a color picker.
- In the row script, you have to manually create a string variable with the name "Color", and you must enter the color number.
In the following example for the Tasks entity, we use different colors based on each task's priority.

- Edit an app project in Woodford.
- Go to the Task entity and edit its view.
- Click Row Script, create the Color variable (string), and define a rule that applies colors.
- Save all changes and publish the app project.

Enter the color value in the following format: #AARRGGBB: AA = Alpha/Transparency, RR = Red channel, GG = Green channel, BB = Blue channel.
String operations: replace full name with first name and first letter
In the following example for the user entity, we create a string variable and fill it with the first name and the first letter of the surname.
- Find the position of the first space in the full name using the IndexOf operator.
- Create a substring of the full name that includes the first name and two more characters (space and first letter of the surname).
- Add a dot at the end.

You can then place the variable on the view instead of the full name. The screenshot below shows the view in the Schedule Board.

Change style on view dynamically
Since version 10.1, there is also a different option in changing the field style on view dynamically, based on its value or other conditions instead of creating a different row design. It is also possible to change the field’s style by using Row Script directly.
To learn more about this approach, please check this part of WEBINAR and HERE to see the setup and see it in action. Webinar
{{#CI form: title = Was this information helpful? How can we improve?
| type = inputs
| [textarea]
}}