Deep dive: Timesheets
| Warning | Work in progress! We are in the process of updating the information on this page. Subject to change. |
Timesheets are a method for tracking the amount of a worker's time spent on each job. The default Resco projects don't include timesheets out-of-the-box. This article describes a simple way of adding timesheets to your organization. No code is required.
About this solution
- Technology used
- Resco mobile app
- Woodford
- Microsoft Dynamics 365/Dataverse
- Power App
- Power Automate
- Custom tables (entities) used
- Timesheet
- Back-office manager creates a new timesheet ("Open").
- Mobile worker submits the completed timesheet in the app ("Submitted").
- Back-office manager reviews and approves it ("Approved").
- Timesheet Entry
- Each timesheet consists of multiple timesheet entries. Entries are created by the mobile worker ("Open") and approved by the manager ("Approved").
- Project
- Each timesheet is assigned to a specific project. Projects can be active or inactive.
- Project Category
- Each project is assigned to a specific project category. Categories can be active or inactive.
- Standard (system) tables used
- User (employee)
- Account (customer)
MVP
TBD
UX improvements
In this section, we describe several optional additions that improve the user experience of mobile users.
Color code timesheet entries
Goal: Visually distinguish between timesheet entries depending on their status
Solution:
- Edit the app project in Woodford and select the Timesheet Entry entity from the Project menu.
- Click Show UI to display the list of views, forms, and charts for this entity.
- Edit the view "All entries".
- Clone the default row two times to create three rows:
- One for open
- One for closed
- One for canceled
- Use the Row selector on the Properties pane to switch between rows. Use an appropriately colored image for each row.
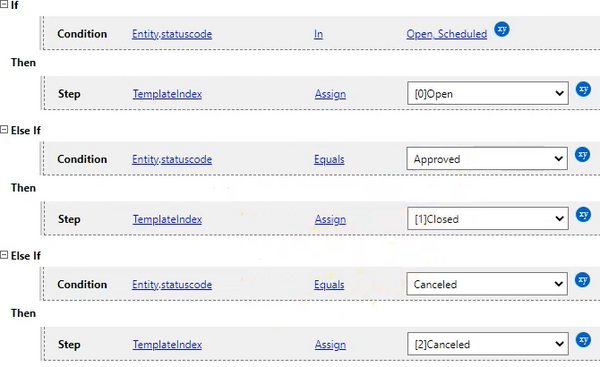
- Click Row Script and enter a simple rule that selects the right row depending on the status reason of the record.

Demo:
TBD_EMBED_VIDEO