Integrations: Difference between revisions
No edit summary |
|||
| Line 22: | Line 22: | ||
=== Metadata mapping === | === Metadata mapping === | ||
As the next step, you need to map external entities to local entities and external fields to local fields. | |||
# Double-click a connection (created in the previous section). | |||
# Select an entity from the '''External Entities''' pane and click '''Enable'''. | |||
# In the '''Entity Mapping''' pane, select the matching '''Local Entity''' and optionally the '''Primary Key'''. | |||
# In the table below, select the fields that you want to import or export (enable the checkbox in the first column) and then select the matching '''Local Field'''. | |||
# Save all changes. | |||
You can repeat these steps for additional external entities as needed. | |||
[[File:Mapping of entity fields.png|600px]] | |||
=== Import/export data === | === Import/export data === | ||
Revision as of 13:30, 2 June 2021
| Integration with third-party systems |
|---|
|
Resco CRM Connector (web APIs):
|
| Warning | This page describes a function that has not yet been publicly released, or has been released in beta / preview quality. Subject to change. |
The Integrations function of Woodford allows you to connect your Resco Cloud organization to various systems using connectors (Resco Cloud, Dynamics, OData). Match entities and fields between the two servers and exchange data. Configured connections can be used in Resco Cloud jobs and workflows to automate sync process.
| Note | Integrations are available since release 14.1 as a preview. Contact us if you want to help us shape this function to better match your needs. |
Available connectors
The following connectors are available:
- OData: Connect to any server that supports the Open Data Protocol (OData v4).
- Resco Cloud: Connect to another organization residing on one of the various cloud servers of Resco (including Resco Inspections, Resco Routes, etc.).
Woodford configuration
You can manage your connections to other servers from the Administration menu of Woodford: Start Woodford and select Integrations (Preview) from the menu.
Create integration
- Click New.
- Name your integration and select which connector to use.
- Depending on the selected connector, enter the necessary connection details.
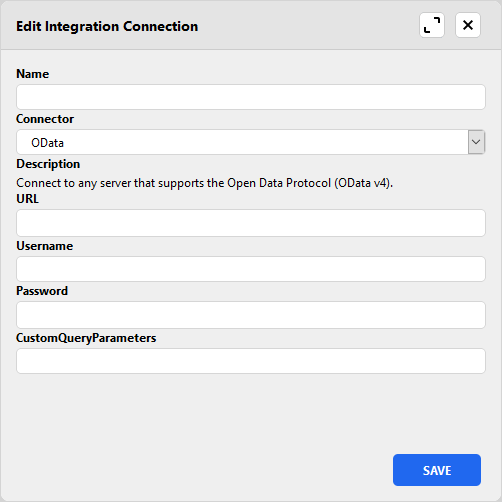
- Click Save.

Metadata mapping
As the next step, you need to map external entities to local entities and external fields to local fields.
- Double-click a connection (created in the previous section).
- Select an entity from the External Entities pane and click Enable.
- In the Entity Mapping pane, select the matching Local Entity and optionally the Primary Key.
- In the table below, select the fields that you want to import or export (enable the checkbox in the first column) and then select the matching Local Field.
- Save all changes.
You can repeat these steps for additional external entities as needed.

Import/export data
Use case: connect to Business Central
You can use Integrations to connect to Microsoft Dynamics 365 Business Central.